


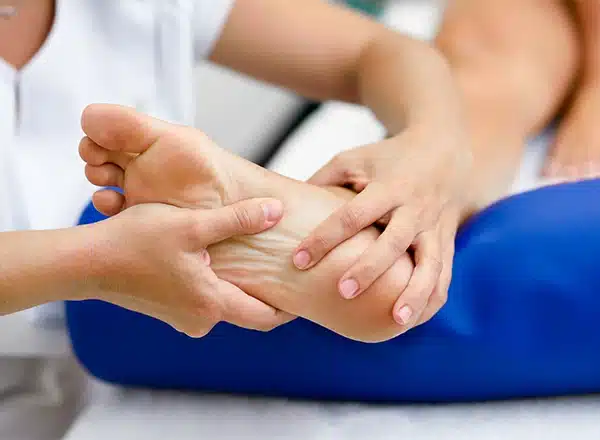
For ankle rehab, the right balance board progression — wobble, rocker, then BOSU — restores the proprioception (joint position sense) that prevents reinjury. Skipping this phase is exactly why most ankle sprains keep recurring.
You’re in the right place. Dr. Tom Biernacki, DPM, FACFAS — board-certified foot & ankle surgeon with 3,000+ surgeries — explains exactly what the best balance boards for ankle rehab means and what works. Call (810) 206-1402 for same-day appointment at Howell or Bloomfield Hills.
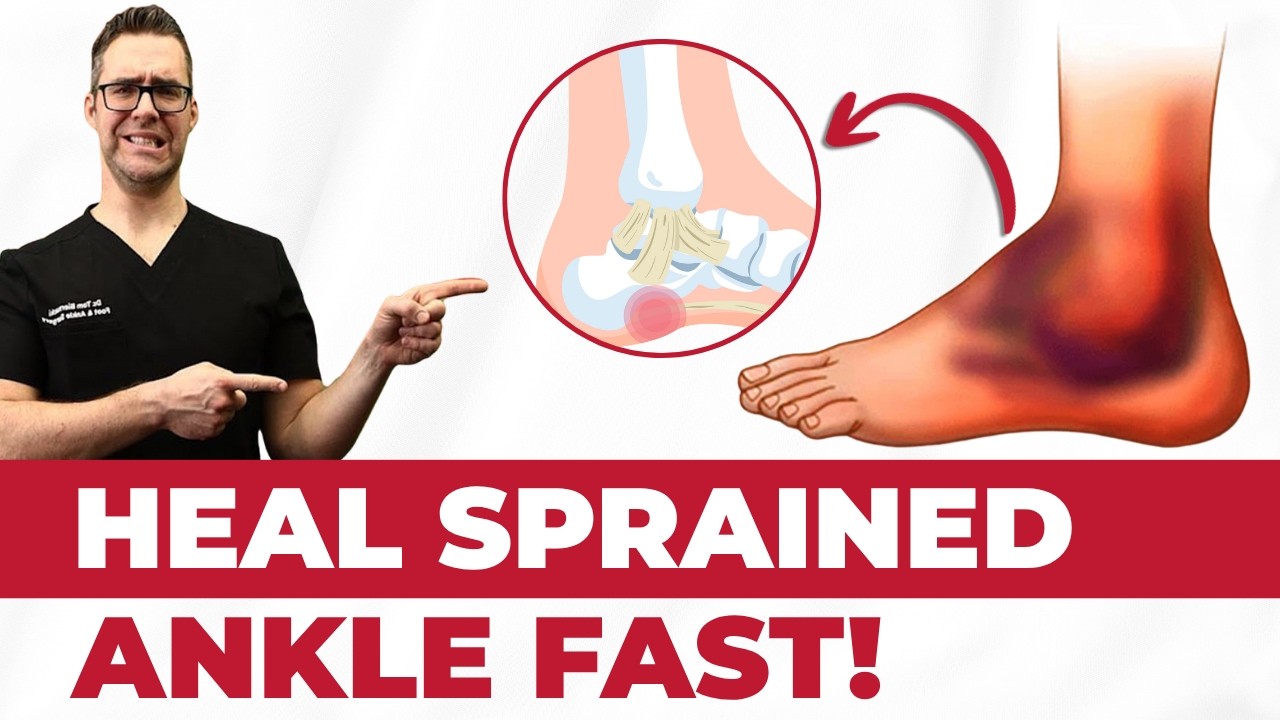
Best Balance Boards for Ankle Rehab 2026: Podiatrist Guide to Wobble Boards & Proprioception Training
🏥 Reviewed by Dr. Tom Biernacki, DPM — Board-Certified Podiatrist & Foot Surgeon
Balance Foot & Ankle | Howell & Brighton, Michigan
Ankle sprain is the most common musculoskeletal injury in active adults — and the most under-rehabilitated. Dr. Biernacki has treated thousands of ankle sprains and chronic ankle instability cases, and the consistent finding is that patients who complete a full proprioceptive rehabilitation protocol — including balance board training — have dramatically lower re-injury rates than those who stop at pain resolution. This guide reflects the exact balance board progression he prescribes.
⭐ 4.9/5 — 1,123+ Google Reviews | Call: (517) 315-6810
⚡ Quick Answer: Best Balance Boards for Ankle Rehab 2026
Best Overall: BOSU Balance Trainer Home Version (B00012PDMW) — the versatile half-ball platform used in PT clinics worldwide, ideal for Phase 2–3 ankle rehab and long-term stability maintenance. Best Axis Board for Early Rehab: Bamboo Ankle Axis Board (B0G2MWN26K) — single-plane wobble for controlled early-phase proprioception. Best Full Wobble for Advanced Rehab: Ankle Wobble Balance Board (B0G4D682CX) — 360° instability for late-phase neuromuscular training. Best with PT Guidance: Frgofl Balance Board (B0FN82STTH) — includes video exercise guide ideal for home rehabilitation.
Ankle sprain recurrence rates are alarmingly high: research consistently shows that 40–70% of people who sustain a lateral ankle sprain go on to experience repeated sprains within 12 months if they don’t complete a full rehabilitation protocol. The reason is straightforward — pain resolution and ligament healing are not the same as functional recovery. After a sprain, the mechanoreceptors embedded in the lateral ankle ligaments (ATFL and CFL) are disrupted, impairing proprioception — the body’s ability to sense joint position and initiate protective reflexes before the ankle “gives way.” A patient can be completely pain-free and still have significantly impaired ankle proprioception, meaning the next sprain is literally waiting to happen.
Balance board training directly addresses this proprioceptive deficit. The controlled instability created by a wobble board, rocker board, or BOSU forces the neuromuscular system to continually detect and correct small perturbations in joint position — exactly the scenario that occurs in the milliseconds before an ankle rolls. Repeated training on unstable surfaces rewires the ankle’s reflexive stabilization pattern, reducing the time between a destabilizing perturbation and the protective peroneal muscle activation that prevents a full roll. This is why proprioceptive training is the evidence-based standard of care for chronic ankle instability rehabilitation.
Choosing the right balance board for ankle rehab requires matching the device’s instability level to the patient’s current rehabilitation phase. Too much instability too early causes compensatory loading patterns and risk of re-injury on the device itself. Too little challenge never produces the neuromuscular adaptation needed. The progression from rocker board (single-plane, controlled) → wobble board (360°, moderate challenge) → BOSU (dynamic, multi-directional) → sport-specific training matches the documented phases of ankle rehabilitation and is reflected in the six picks below.
Ankle Rehab Phases: How Balance Board Training Fits the Recovery Arc
📋 Dr. Biernacki’s 4-Phase Ankle Rehabilitation Protocol
- Phase 1 (Week 1–2, acute): RICE protocol, protected weight-bearing, ankle alphabet exercises, towel scrunches. NO balance board yet — the ankle is too acutely inflamed and ligaments too fragile for perturbation training.
- Phase 2 (Week 2–4, sub-acute): Single-plane rocker board (axis board) — controlled front-to-back or side-to-side wobble only. 2 minutes × 3 sets, twice daily. Bilateral stance, progressing to single-leg when bilateral is pain-free and stable.
- Phase 3 (Week 4–8, neuromuscular): 360° wobble board, BOSU flat side up. Single-leg balance 30–60 seconds × 5 reps. Add perturbation challenges: ball toss while balancing, eyes closed, head turns. Progress to BOSU dome side up when stable.
- Phase 4 (Week 8–12+, functional): BOSU dome side up with dynamic movements — squat, lunge, step-up. Progress to sport-specific tasks: lateral shuffle, jump landing. Return to sport clearance when symmetrical single-leg stance time achieved.
The single most important concept in ankle rehab progression is that pain is a poor guide to readiness for the next phase. Patients frequently feel ready to return to activity or advance to more challenging balance training before the neuromuscular system has actually adapted. The benchmark Dr. Biernacki uses clinically is single-leg stance time with eyes closed: when a patient can maintain single-leg balance on the injured side for 15 seconds with eyes closed with minimal sway — matching the uninjured side — they are ready to advance phases. This is a more reliable functional marker than pain level alone.
Chronic ankle instability — the syndrome of repeated giving way and reduced confidence in the ankle that develops when acute sprain rehabilitation is incomplete — affects an estimated 40% of people who sustain a first ankle sprain. It’s the predictable consequence of untreated proprioceptive deficit. The good news is that chronic ankle instability responds well to a focused balance board protocol even years after the original injury: research shows 8–12 weeks of progressive proprioceptive training produces clinically meaningful improvements in self-reported instability, giving-way episodes, and balance performance in chronic instability patients. It’s never too late to complete the rehabilitation that should have happened at the time of the original sprain.
Watch: Podiatrist Explains Ankle Rehab & Stability Training
6 Best Balance Boards for Ankle Rehab 2026 — Podiatrist Reviewed
Each product below is evaluated for its appropriate rehabilitation phase, instability level, stability under load, surface quality, and durability. Dr. Biernacki recommends these specific tools to ankle sprain and chronic instability patients at Balance Foot & Ankle’s Howell and Brighton clinics.
1. BOSU Balance Trainer Home Version — Best Overall for Ankle Rehab
The BOSU (Both Sides Up) Balance Trainer is the most versatile proprioceptive training tool available for home use, and the version Dr. Biernacki most commonly recommends as the cornerstone of a long-term ankle stability program. The half-ball construction creates a fundamentally different challenge depending on which side is up: dome side up provides a dynamic, multi-directional instability that demands constant ankle stabilizer activation; flat side up creates a rocker-board-style single-plane challenge appropriate for earlier rehabilitation phases. This dual-mode capability means one device spans Phases 2 through 4 of the ankle rehabilitation protocol — replacing what would otherwise require multiple separate boards.
Clinically, the BOSU flat-side-up position is the standard Phase 3 progression tool for ankle proprioception: standing on the flat platform with the dome down creates 360° wobble challenges while the flat surface gives the foot a familiar ground reference. When patients master bilateral standing and then single-leg standing on flat-up BOSU, switching to dome-up introduces greater dynamic challenge and begins bridging to sport-specific functional training. The progression is clear, measurable, and documented in the physical therapy literature as effective for chronic ankle instability rehabilitation.
The Home Version’s 65cm dome diameter is identical in function to the commercial Pro version at a substantially lower price point — the primary difference is commercial-grade vs. home-use durability ratings. For patients using it 20–30 minutes daily in a home rehabilitation program, the Home Version holds up well for 3–5+ years of consistent use. The non-slip base prevents the device from sliding on hardwood or tile floors during dynamic exercises, and the included hand pump inflates the dome to the recommended resistance level in minutes.
2. Bamboo Ankle Axis Board — Best for Early-Phase Controlled Rehab
The single-plane axis board is the correct Phase 2 tool for ankle proprioception — it creates controlled, predictable instability in a single plane (medial-lateral or anterior-posterior depending on orientation), which is the appropriate challenge level when the ankle is sub-acute and the ligaments are still consolidating. The Bamboo Ankle Axis Board uses a quick-release interchangeable axis system that allows the board to be set for either front-to-back or side-to-side rocking, and then advanced to a 360° full wobble axis when ready for Phase 3 — making it a two-in-one device that covers both the early and intermediate phases of rehabilitation.
Bamboo is an underrated construction material for balance boards — it’s lighter than hardwood while being comparably durable, and the natural texture provides excellent grip for bare or socked feet without requiring adhesive grip pads that degrade with use. The scraper tool included with the board is useful for removing foot calluses during rehab, a practical secondary benefit for patients whose skin integrity changes during the recovery period. Two training levels (controlled axis swap) allow systematic progression without purchasing a second device.
Best for: Patients in the sub-acute Phase 2 of ankle sprain recovery (weeks 2–4), patients with chronic ankle instability who are starting a formal rehab program from a low baseline, older patients who need a predictable, controlled challenge before advancing to 360° wobble training, and physical therapists or coaches who want a progressable single device for early-to-intermediate rehabilitation.
3. Ankle Wobble Balance Board 300lb — Best 360° Wobble for Phase 3
The transition from controlled single-plane rocker training to 360° wobble board training is the most challenging step in ankle proprioception rehabilitation — and the most important for preventing re-injury. The 360° wobble board creates multi-directional perturbations that mimic the actual loading environment of sport and daily activity: the ankle never faces a purely predictable challenge in real life, and the training tool must eventually match that unpredictability. This reliable 300lb-capacity wobble board produces the controlled chaos of 360° instability while maintaining a stable, non-slip base that prevents the board itself from sliding during vigorous balance challenges.
The dome height of this board is calibrated to produce clinically appropriate instability — significant enough to continuously demand ankle stabilizer activation, but not so extreme that falls or compensatory hip and trunk movements dominate over ankle-specific training. This calibration matters: boards with overly deep domes produce a challenge that exceeds the ankle’s capacity and forces patients to stabilize primarily from the hip and core, defeating the purpose of ankle-specific proprioceptive training. Dr. Biernacki evaluates board dome depth when recommending wobble boards to patients, and this model sits in the ideal functional range.
4. Frgofl Balance Board with Video Guide — Best for Home PT Protocol
For patients doing ankle rehabilitation at home without ongoing physical therapy supervision, the Frgofl Balance Board’s included video exercise guide is a clinically meaningful advantage. Most balance board products provide the equipment without the protocol — leaving patients to guess at appropriate exercises, sets, reps, and progression criteria. The included video guide structures the rehabilitation into a systematic program that matches the phase-based progression Dr. Biernacki uses in clinical practice, reducing the most common home rehab failure mode: doing balance board work without a structured progression and plateauing or regressing as a result.
The board itself is a solid single-leg axis board design — appropriately challenging for early-to-intermediate ankle proprioception training. The included carry bag makes it practical for patients who travel for work and want to maintain their rehabilitation program on the road. Ankle rehabilitation doesn’t pause for travel, and a compact, packable board removes the single biggest compliance barrier for mobile patients: inconsistent access to equipment.
Best for: Patients doing independent home rehabilitation after ankle sprain or for chronic instability management, patients who want structured guidance rather than figuring out a protocol independently, athletes maintaining ankle stability during travel or away-from-gym training blocks, and anyone for whom physical therapy attendance is limited and self-directed home programming must carry more of the rehabilitation load.
5. Ankle Balance Board for Strength & Stability — Best for Plantar Fasciitis Crossover
While primarily an ankle rehab tool, this balance board is specifically marketed for plantar fasciitis relief as well as ankle sprain recovery — an appropriate dual use, because the intrinsic foot muscle strengthening and arch neuromuscular control that comes from balance board training directly benefits plantar fascia loading mechanics. Patients with both ankle instability and plantar fasciitis — a common combination, since ankle instability causes compensatory subtalar hyperpronation that overloads the plantar fascia — get double rehabilitation value from this product.
The board’s platform is sized appropriately for single-leg training, with a dome height producing a 360° wobble challenge in the moderate difficulty range — appropriate for Phase 3 rehabilitation. The non-slip surface is textured for barefoot training, which is preferred for ankle proprioception work because footwear reduces the sensory input from the plantar surface that contributes to proprioceptive feedback. Whenever safely possible, ankle balance board training should be done barefoot or in thin-soled socks for maximum sensory input.
Posture correction is listed as a secondary benefit — a legitimate one. Ankle proprioceptive deficits cascade up the kinetic chain: poor ankle stability alters knee mechanics, which alters hip mechanics, which alters lumbar position. Comprehensive ankle rehabilitation, including balance board training, often produces improvements in knee tracking, hip alignment, and lumbar posture as secondary benefits that patients notice after several weeks of consistent training.
6. Ankle Balance Board for Sprain Recovery — Best Budget Entry Option
For patients who are just beginning ankle rehabilitation and want to try balance board training before committing to a premium device, this budget-friendly option provides the essential function — controlled single-leg instability training — at an accessible price point. The rocker design creates a reliable ankle proprioception challenge appropriate for Phase 2–3 rehabilitation, and the non-slip surface and adequate weight capacity make it safe for adult use during supervised home training.
The primary limitation relative to premium options is adjustment range: this board provides a single fixed instability level, which means patients will outgrow it as proprioception improves and need to progress to a device with greater challenge. This is clinically fine as a starting point — the important thing is beginning proprioceptive training after ankle sprain, and this board removes any financial barrier to starting. Once patients are consistently maintaining single-leg balance for 30+ seconds with confidence on this board, progressing to the BOSU or 360° wobble board is the recommended next step.
Best for: Patients who want to start ankle rehabilitation without a large upfront equipment investment, patients uncertain whether they’ll adhere to a balance board protocol before committing to a premium device, pediatric patients with ankle sprain where a starter device is appropriate before adult-sized boards, and as a secondary board for bilateral training when the primary board is already occupied in a clinic or training setting.
Balance Board Comparison Table 2026
| Board | Type | Rehab Phase | Challenge Level | Dr. Rating |
|---|---|---|---|---|
| BOSU Home Version | Half-ball dome | Phase 3–4 | Moderate → Advanced | ⭐⭐⭐⭐⭐ Best Overall |
| Bamboo Axis Board | Single-plane rocker | Phase 2–3 | Beginner → Intermediate | ⭐⭐⭐⭐⭐ Best Early Rehab |
| Wobble Board 300lb | 360° wobble dome | Phase 3 | Intermediate | ⭐⭐⭐⭐½ Best 360° Wobble |
| Frgofl with Video | Axis board + guide | Phase 2–3 | Beginner → Intermediate | ⭐⭐⭐⭐ Best Home Protocol |
| Ankle Balance Board | 360° wobble dome | Phase 3 | Intermediate | ⭐⭐⭐⭐ Best PF Crossover |
| Budget Sprain Board | Basic rocker | Phase 2 | Beginner | ⭐⭐⭐½ Best Budget Entry |
More Podiatrist-Recommended Foot Health Essentials
Hoka Clifton 10

Max-cushion everyday shoe — podiatrist favorite for walking and running.

OOFOS Recovery Slide

Impact-absorbing recovery sandal — wear after long days on your feet.
As an Amazon Associate, Balance Foot & Ankle earns from qualifying purchases. Product recommendations are based on clinical experience; prices and availability shown above update live from Amazon.
When to See a Podiatrist
If foot or ankle pain has been bothering you for more than a few weeks, home care alone may not be enough. Balance Foot & Ankle offers same-week appointments at our Howell and Bloomfield Hills clinics — no referral needed in most cases. Bring your current shoes and a short list of symptoms and we’ll build you a treatment plan in one visit.
Call Balance Foot & Ankle: (810) 206-1402 · Book online · Offices in Howell & Bloomfield Hills
Frequently Asked Questions: Balance Boards for Ankle Rehab
When can I start balance board training after an ankle sprain?
The standard clinical guideline is to begin very gentle balance board work (single-plane axis board, bilateral stance) once pain allows full weight-bearing without a significant limp — typically 10–14 days after a Grade I or II lateral ankle sprain, or as directed by your podiatrist following imaging to rule out fracture. Grade III sprains (complete ATFL rupture, possible surgical repair) have a longer timeline and require direct medical supervision for rehabilitation initiation. The key early-phase principle is: the balance board should never produce pain during training. Proprioceptive training can begin while some residual swelling is present, but pain with weight-bearing on the board means the tissue is not ready — rest one additional week and reassess. Dr. Biernacki performs ankle evaluations and provides phase-specific rehabilitation clearance at both Balance Foot & Ankle locations.
How long should I do balance board training for ankle rehab?
A complete ankle rehabilitation protocol takes 8–12 weeks from injury to return-to-sport clearance for most Grade I–II sprains. Balance board training occupies weeks 2–12, with progressive challenge increases every 2 weeks. Maintenance training — continuing some balance board work 2–3 times per week indefinitely — is strongly recommended to prevent recurrence, as proprioceptive gains diminish within 4–6 weeks of stopping. For competitive athletes, Dr. Biernacki recommends year-round ankle proprioception training as injury prevention even in the absence of prior sprain. The time investment is modest — 10 minutes three times per week — relative to the substantial benefit in injury risk reduction.
Can balance board training replace physical therapy for ankle sprains?
For most Grade I–II lateral ankle sprains in otherwise healthy patients, a structured home balance board protocol can be highly effective when combined with appropriate initial evaluation to rule out fracture and ligament rupture, and when the patient follows a systematic phase-based progression. Physical therapy adds manual therapy techniques, therapeutic ultrasound for acute swelling, and direct professional supervision of exercise technique — all of which accelerate recovery and are worth the investment, particularly for athletes with performance timelines or patients with Grade II–III sprains. For patients with limited access to physical therapy, the Frgofl board’s included video protocol provides a reasonable home alternative. If symptoms don’t improve as expected within 3–4 weeks of home rehabilitation, professional evaluation is warranted to ensure no missed injury (peroneal tendon tear, osteochondral defect, syndesmotic sprain) is present.
Is a BOSU or a wobble board better for ankle rehab?
They serve different purposes in the rehabilitation arc. A wobble board (360° dome) is the appropriate tool for mid-phase proprioception training — intense enough to challenge the ankle neuromuscular system while remaining controllable. The BOSU, used flat side up, creates a similar moderate challenge and then, when flipped dome-up, provides a more dynamic platform for late-phase functional training including squats, lunges, and eventually sport-specific movements. For a patient buying one device for the whole rehabilitation arc, the BOSU is more versatile. For a patient who already has a 360° wobble board and wants to progress, adding a BOSU is the logical next step.
What exercises should I do on a balance board for ankle rehab?
The standard progression for Phase 3 balance board training is: (1) Bilateral stance, eyes open, 1 minute; (2) Single-leg stance, eyes open, 30 seconds × 3 reps per side; (3) Single-leg stance, eyes closed, 15–30 seconds × 3 reps; (4) Single-leg stance with head turns, 30 seconds × 3 reps; (5) Single-leg stance with ball toss or catching, 1 minute × 3 reps; (6) Mini-squat on single leg, 10 reps × 3 sets. Phase 4 adds dynamic movements: lateral shuffle step-ons, jump landings, diagonal step patterns. The key principle throughout is that the ankle — not the hip and core — should be the primary stabilizer. If the patient is significantly compensating with upper body swaying or hip abduction to maintain balance, the challenge level is too high and should be reduced.
⚠️ Don’t Start Balance Board Training If You Have These Findings
Balance board training is safe for most ankle sprains — but not until specific conditions are met. Do NOT begin balance board rehab if any of the following apply:
- Ankle fracture not yet cleared — always get imaging (X-ray at minimum) after a significant ankle sprain to rule out distal fibula, talus, or fifth metatarsal fracture
- Unable to bear full weight without significant pain — Phase 2 balance board training requires near-full weight tolerance; if weight-bearing is still painful, you’re not ready
- Significant swelling or bruising that has not begun to resolve — active acute inflammation contraindicates progressive loading
- Suspected Grade III sprain (complete ligament rupture) — requires MRI evaluation and possibly surgical repair before initiating rehabilitation
- Numbness, tingling, or foot drop after ankle injury — nerve involvement (peroneal nerve contusion) requires neurological evaluation before balance training
- Balance board use triggers sharp joint pain rather than muscle effort — stop and get evaluated; osteochondral lesions of the talus can present this way
Call Balance Foot & Ankle for ankle sprain evaluation: (517) 315-6810
Related Podiatrist Guides
- Best Calf Stretchers for Plantar Fasciitis 2026
- Best Kinesiology Tape for Ankle Sprains 2026
- Best Ice Packs for Foot & Ankle Pain 2026
- Best TENS Units for Foot & Ankle Pain 2026
- Best Compression Socks for Ankle Recovery 2026
- Best Heel Lift Inserts 2026
- Best Foot Rollers for Recovery 2026
- Best Podiatrist-Recommended Orthotics 2026
🏥 Ankle Instability or Recurring Sprains? See Dr. Biernacki
If you’ve sprained your ankle more than once, or your ankle still feels unstable months after an injury, a hands-on exam plus imaging when needed is the right next step. Dr. Tom Biernacki performs ankle ligament assessments, functional gait analysis, and individualized rehabilitation protocols at Balance Foot & Ankle in Howell and Brighton, Michigan. Same-week appointments available — most insurance plans accepted.
Book an Appointment → (517) 315-6810Watch: Dr. Tom explains
Podiatrist-recommended products
As an Amazon Associate, Dr. Tom earns from qualifying purchases.
Proprioceptive training.
View on Amazon →Advanced balance progression.
View on Amazon →Support between rehab sessions.
View on Amazon →Early rehab stability.
View on Amazon →Related resources
Ready to solve this? Book today.
Same-week appointments · Howell & Bloomfield Hills · 4.9★ (1,123+ reviews)
☎ (810) 206-1402Book Online →When Shoes Aren’t Enough — Dr. Tom’s Top 9 Orthotics
About 30% of patients I see for foot pain need MORE than a great shoe — they need a structured insole. Below: my complete 2026 orthotic ranking with pros, cons, and the specific patient I’d give each one to.
★ DR. TOM’S COMPLETE 2026 ORTHOTIC RANKING
9 Best Prefab Orthotics by Use Case
PowerStep, Currex, Spenco, Vionic, and Superfeet — every orthotic I’ve fitted to thousands of patients across both Michigan offices. Each card includes pros, cons, and the specific patient I’d give it to. Real Amazon ratings, review counts, and prices below.
Best All-Purpose Orthotic for Most Patients
Semi-rigid arch shell + dual-layer cushion + deep heel cup. The orthotic I’ve fitted to more patients than any other for 15 years. APMA-accepted. Trim-to-fit design works in athletic shoes, casual shoes, and most work boots.
✓ Pros
- Semi-rigid arch shell provides true biomechanical correction
- Deep heel cup centers the heel and reduces lateral instability
- Dual-layer cushion (top + bottom) lasts 9-12 months daily wear
- Available in 8 sizes for precise fit
- APMA-accepted and clinically validated
- Lower price than Superfeet Green for equivalent function
✗ Cons
- Too thick for most dress shoes (use ProTech Slim instead)
- Some break-in period required (3-7 days for arch tolerance)
- Not enough correction for severe pes planus or rigid pes cavus
Dr. Tom’s Recommendation: If a patient has run-of-the-mill plantar fasciitis, mild flat feet, or arch fatigue, this is the first orthotic I try. Better value than Superfeet for 90% of patients, which is why I swapped it into our clinic kits three years ago. Sub-$50 typically.
Maximum Motion Control · Flat Feet & Severe Over-Pronation
PowerStep’s most aggressive stability orthotic. Adds a 2°-7° medial heel post on top of the standard PowerStep platform — designed specifically for flat-footed patients and severe pronators who need real corrective force.

✓ Pros
- 2°-7° medial heel post adds aggressive pronation control
- Same trusted PowerStep arch shell, more correction
- Built specifically for flat-foot biomechanics
- Excellent for posterior tibial tendon dysfunction (PTTD)
- Removable top cover for cleaning
✗ Cons
- Too aggressive for neutral-arch patients
- Needs longer break-in (10-14 days) due to stronger correction
- Adds 2-3 mm of stack height — won’t fit slim dress shoes
Dr. Tom’s Recommendation: When a patient comes in with significant flat feet AND symptoms (heel pain, arch pain, knee pain), the Original PowerStep isn’t aggressive enough. The Maxx is what gets prescribed. About 25% of my flat-footed patients end up here.
Low-Profile · Fits Dress Shoes & Narrow Casuals
3 mm slim profile with podiatrist-designed tri-planar arch technology. Engineered specifically to fit inside dress shoes, oxfords, loafers, and women’s flats without crowding the toe box. Vionic was founded by an Australian podiatrist.
✓ Pros
- 3 mm slim profile (vs 7-10 mm for standard orthotics)
- Tri-planar arch technology adds support without bulk
- Built-in deep heel cup despite slim design
- Fits dress shoes WITHOUT having to remove the factory insole
- Trim-to-fit · APMA-accepted
✗ Cons
- Less arch support than full-volume orthotics
- Top cover wears faster than thicker alternatives
- Not enough correction for severe foot deformities
Dr. Tom’s Recommendation: My default when a patient says ‘I need orthotics but I have to wear dress shoes for work.’ Slim enough to fit in oxfords and pumps without the heel sliding out. The single highest-impact change you can make for office workers with foot pain.
Built-In Metatarsal Pad · Morton’s Neuroma · Ball-of-Foot Pain
Standard Pinnacle orthotic with a built-in metatarsal pad positioned proximal to the metatarsal heads — the exact location that offloads neuromas and metatarsalgia. No need for separate met pads or pad placement guesswork.

✓ Pros
- Built-in met pad eliminates DIY pad placement errors
- Specifically designed for Morton’s neuroma + metatarsalgia
- Same trusted PowerStep arch + heel cup platform
- Top cover protects sensitive forefoot skin
- Faster relief than orthotics + add-on met pads
✗ Cons
- Met pad position is fixed (can’t fine-tune individual placement)
- Some patients with very small or very large feet need custom
- Slightly thicker than the standard Pinnacle
Dr. Tom’s Recommendation: If a patient has Morton’s neuroma, sesamoiditis, or generalized ball-of-foot pain (metatarsalgia), this saves a clinic visit and a prescription. The built-in pad placement is anatomically correct for 80% of feet. Way better than DIY met pads.
Adaptive Dynamic Arch · Athletic & Daily Wear
Currex’s flagship adaptive arch technology — the orthotic flexes with your gait instead of fighting it. Different stiffness zones along the length give you targeted support at the heel, midfoot, and forefoot. Available in three arch heights (low/medium/high).
✓ Pros
- Dynamic flex zones adapt to natural gait cycle
- Three arch heights ensure precise fit
- Lighter than rigid orthotics (no ‘heavy foot’ feel)
- Excellent for runners and athletic walkers
- European podiatric design (German engineering)
✗ Cons
- More expensive than PowerStep Original ($55-65 typically)
- Less aggressive correction than Pinnacle Maxx for severe cases
- Three arch heights means you must self-select correctly
Dr. Tom’s Recommendation: I started recommending Currex three years ago for runners who said PowerStep felt ‘too rigid.’ The dynamic flex zones respect natural gait. Best for active patients who walk 8K+ steps daily and don’t need maximum motion control.
Running-Specific · Heel Strike + Forefoot Strike Compatible
Currex’s purpose-built running orthotic. The midfoot flex zone is positioned for runner’s gait mechanics, with a flared heel cushion for heel strikers and a forefoot rocker for midfoot/forefoot strikers. Tested on 1000+ runners during product development.

✓ Pros
- Designed by German biomechanics lab specifically for runners
- Dynamic arch flexes with running gait (not static like PowerStep)
- Three arch heights (low/medium/high)
- Reduces overuse injury risk in mid-distance runners
- Lightweight (no impact on cadence)
✗ Cons
- Premium price ($60-75)
- Not aggressive enough for severe over-pronators (use Pinnacle Maxx)
- Runner-specific design = less ideal for daily walking shoes
Dr. Tom’s Recommendation: If a patient runs 20+ miles per week and has plantar fasciitis or shin splints, this is the orthotic I prescribe. The dynamic flex zones respect running biomechanics in a way that no rigid PowerStep can match. Pricier but worth it for serious runners.
Cavus Foot & High-Arch Patients
Polyurethane base with a deeper heel cup and higher arch profile than PowerStep — built for cavus (high-arched) feet that need maximum cushion and support. The 5-zone cushioning system addresses the unique pressure points of high-arch feet.

✓ Pros
- Deeper heel cup centers the heel for cavus foot stability
- Higher arch profile fills the void under high arches
- 5-zone cushioning addresses cavus foot pressure points
- Polyurethane base lasts 12+ months
- Available in Wide width
✗ Cons
- Too tall/aggressive for normal or low arches
- Won’t fit slim dress shoes
- Pricier than PowerStep Original
- Some patients find the arch height uncomfortable initially
Dr. Tom’s Recommendation: Cavus foot patients are often misdiagnosed and given low-arch orthotics — that makes everything worse. Spenco’s Total Support has the arch profile that high-arch feet actually need. About 15% of my patients have cavus feet; this is what they wear.
Cushion Layer · Standing All Day · Gel Pressure Relief
NOT a true biomechanical orthotic — this is a cushion insole. But for patients who want gel pressure relief instead of arch correction (or to add ON TOP of factory insoles in work boots), this is the best gel option on Amazon.

✓ Pros
- Genuine gel cushioning (not foam pretending to be gel)
- Targeted gel waves under heel and ball of foot
- Trim-to-fit · works in most shoe types
- Sub-$15 price (most affordable option in this list)
- Massaging texture is genuinely soothing
✗ Cons
- ZERO arch support — this is cushion only
- Won’t fix plantar fasciitis or flat-foot issues
- Compresses faster than PowerStep (4-6 months)
- Top cover wears through in high-mileage applications
Dr. Tom’s Recommendation: I recommend these to patients who tell me ‘I just want my feet to stop hurting at the end of my shift’ and who don’t have a biomechanical issue. Construction workers, factory workers, retail. Pure cushion does the job for them.
Tight-Fitting Shoes · Cycling Shoes · Hockey Skates
Superfeet’s slim version of their famous Green insole. The trademark stabilizer cap is preserved but the overall thickness is reduced — works in cycling shoes, hockey skates, ski boots, and other tight-fitting footwear that the standard Superfeet Green can’t fit into.

✓ Pros
- Stabilizer cap centers the heel (Superfeet’s signature feature)
- Slim profile fits tight athletic footwear
- Lasts 12+ months daily wear
- Excellent for cycling shoes specifically
- Built-in odor-control treatment
✗ Cons
- Premium price ($45-55)
- Less cushion than PowerStep equivalents
- Not as aggressive correction as Pinnacle Maxx for flat feet
- The signature ‘heel cup feel’ takes 1-2 weeks to adapt to
Dr. Tom’s Recommendation: If you’re a cyclist with foot numbness, hot spots, or knee pain — this is the orthotic. The stabilizer cap solves cycling-specific biomechanical issues that no other orthotic addresses. Worth the premium for athletes.
None of these solving your foot pain?
Some patients (about 30%) need custom-molded prescription orthotics. We make 3D-scanned custom orthotics in our Howell and Bloomfield Hills offices — specifically built for your foot mechanics.
Schedule a Custom Orthotic Fitting →FSA/HSA eligible · Most insurance accepted · (810) 206-1402
Dr. Tom’s Ankle Rehab Essentials
- Doctor Hoy’s Natural Pain Relief Gel — Topical arnica + camphor for ankle pain relief between sessions. Apply 3-4x daily.
- PowerStep Pinnacle — Arch support to offload ankle during weight-bearing rehab.
- DASS Medical Compression Socks — Graduated compression to reduce swelling post-training.
Persistent ankle instability after rehab? Learn about our in-office ankle instability treatment. Same-day eval: (810) 206-1402.
In-Office Treatment at Balance Foot & Ankle
If home treatment isn’t providing relief for your ankle instability, our podiatry team at Balance Foot & Ankle can help with same-day evaluations and advanced in-office care.
When should I see a podiatrist?
If symptoms persist past 2 weeks, affect your normal activity, or are accompanied by red-flag symptoms (warmth, redness, swelling, inability to bear weight).
What does treatment cost?
Most diagnostic visits and conservative treatments are covered by Medicare and major insurers. Out-of-pocket costs vary by your specific plan.
How quickly can I get an appointment?
Most non-urgent cases see us within 5 business days. Urgent cases (sudden pain, possible fracture) typically same or next business day.
What is Foot pain?
Foot pain is a common foot/ankle condition that affects mobility and quality of life. Understanding the underlying cause is the first step in successful treatment. Our podiatrists at Balance Foot & Ankle perform a hands-on biomechanical exam, review your activity history, and use diagnostic imaging when appropriate to identify the root cause—not just treat the symptom. Many patients have been told to “rest and ice” without a deeper diagnostic workup; our approach is different.
Symptoms and warning signs
Common signs of foot pain include pain that worsens with activity, morning stiffness, swelling, tenderness when palpated, and difficulty bearing weight. If you experience sudden severe pain, inability to walk, visible deformity, numbness or color change, contact our office the same day or visit urgent care—these can signal a more serious injury such as a fracture, tendon rupture, or vascular compromise. Diabetics with any foot wound should seek same-day care.
Conservative treatment options
Most cases of foot pain respond to non-surgical care: structured rest, supportive footwear changes, custom orthotics, targeted stretching and strengthening protocols, anti-inflammatory medications when medically appropriate, and in-office procedures such as ultrasound-guided injections. We also offer advanced therapies including MLS laser therapy, EPAT/shockwave, regenerative injections, and image-guided procedures. Treatment is sequenced from least invasive to most invasive, and we explain the rationale at every step.
When is surgery considered?
Surgery is reserved for cases that fail 3-6 months of well-structured conservative care, when there is structural pathology (severe deformity, complete tear, advanced arthritis), or when imaging shows damage that will not heal without intervention. Our surgeons have performed 3,000+ foot and ankle procedures and prioritize minimally-invasive techniques whenever appropriate. We discuss recovery timelines, return-to-activity milestones, and realistic outcome expectations before any procedure is scheduled.
APMA: Podiatric Medicine — Services, Conditions & Patient Resources
Recovery timeline and prevention
Recovery from foot pain varies based on severity and chosen treatment path. Conservative cases often improve within 4-8 weeks with consistent adherence to the protocol. Post-procedural recovery may range from a few days (in-office procedures) to several months (reconstructive surgery). Long-term prevention involves footwear assessment, activity modification, structured strengthening, and regular check-ins with your podiatrist if you have a history of recurrence. We provide written home-exercise plans and digital follow-up support.
Ready to feel better?
Same-week appointments available in Howell and Bloomfield Hills, Michigan.
Book Your VisitGet Expert Care at Balance Foot & Ankle
Same-week appointments at our Howell and Bloomfield Hills offices. Board-certified podiatric surgeons. Most insurance accepted.
Dr. Tom Biernacki, DPM is a board-certified foot & ankle surgeon (ABFAS & ABPM) at Balance Foot & Ankle Specialists in Southeast Michigan. With over a decade of clinical experience, he specializes in heel pain, bunions, diabetic foot care, sports injuries, and minimally invasive surgery. Dr. Biernacki is a member of the APMA and ACFAS, and his patient education content on MichiganFootDoctors.com and YouTube has made him one of the most-followed foot & ankle educators on YouTube.