

This page covers the clinical evaluation, evidence-based treatment options, and recovery timeline for ankle sprain exercises at Balance Foot & Ankle in Michigan. For same-week appointments at our Howell or Bloomfield Hills offices, call (810) 206-1402.
| Phase | Timeframe | Goal | Key Exercises | Progress Criteria |
|---|---|---|---|---|
| Phase 1 — Protection + Acute Care | Days 1–3 | Control swelling; protect ligament; maintain ROM | RICE; ankle pumps (20 reps ×4); seated alphabet (toe traces A-Z); gentle ROM circles | Swelling decreasing; able to bear partial weight |
| Phase 2 — Restore ROM + Begin Strengthening | Days 3–14 | Full pain-free ROM; initial muscle activation | Towel calf stretch (3×30s); eversion/inversion with resistance band (3×15); heel raises (bilateral, 3×15); peroneal isometrics | Full ROM; pain ≤2/10 with above exercises |
| Phase 3 — Neuromuscular + Proprioception | Weeks 2–4 | Restore proprioceptive input; single-leg stability | Single-leg stance (eyes open → eyes closed → foam surface); wobble board (3×30s); single-leg heel raises (3×10); lateral band walks | Single-leg balance 30s on foam; pain-free walking on uneven surface |
| Phase 4 — Functional Progression | Weeks 4–6 | Sport-specific movements; dynamic stability | Forward/lateral hop progressions; figure-8 running; lateral shuffle; box step-downs; reactive balance drills | Pain-free at all Phase 4 activities; symmetric hop distance bilaterally |
| Phase 5 — Return to Sport | Weeks 6–8+ (Grade I); 8–12+ (Grade II); 12–16+ (Grade III) | Full unrestricted activity | Sport-specific cutting; sprinting; game simulation; prophylactic bracing protocol | Limb symmetry index >90%; FAAM score ≥90%; single-leg hop test symmetric |
| Exercise | Target | How to Perform | Sets × Reps | Phase |
|---|---|---|---|---|
| Resistance band eversion | Peroneus longus + brevis (primary lateral stabilizers) | Sit; loop band around foot; evert (turn out) against resistance; control return | 3 × 15 each foot | Phase 2+ |
| Resistance band inversion | Tibialis posterior; medial stability | Loop band; invert (turn in) against resistance; slow eccentric return | 3 × 15 | Phase 2+ |
| Calf raises (eccentric emphasis) | Gastrocnemius-soleus; ankle stability | Raise both heels; lower on one foot slowly (3-count); builds tendon-ligament resilience | 3 × 10–15 | Phase 2+ (bilateral first) |
| Single-leg balance on foam | Proprioceptors; peroneal reaction time (key re-sprain prevention) | Stand on affected leg on foam pad; progress to eyes closed; 30-sec holds | 3 × 30s each leg | Phase 3 — most critical exercise |
| Lateral band walks | Hip abductors + peroneals; lateral chain stability | Light resistance band above knees; walk laterally 10 steps each direction | 3 × 10 each direction | Phase 3+ |
| Single-leg hop test | Functional assessment + plyometric loading | Hop forward on one leg; measure and compare distance vs. uninjured side | 3 trials each leg | Phase 4–5 (assessment use) |
| Figure-8 running | Ankle stability under directional change loading | Set cones 5m apart; jog figure-8 pattern at increasing speed | 5 minutes total | Phase 4 |

Watch: Fix TWISTED Ankle, ROLLED Ankle or SPRAINED Ankle Ligaments FASTER! — MichiganFootDoctors YouTube
Foot pain isn't resolving?
Same-week appointments at Howell & Bloomfield Hills
Table of Contents
- Why Exercises Matter After an Ankle Sprain
- Phase 1 Exercises: Acute (Days 1–7)
- Phase 2 Exercises: Mobility (Weeks 1–3)
- Phase 3 Exercises: Strength and Balance (Weeks 3–6)
- Phase 4 Exercises: Return to Sport (Weeks 6–12)
- Products That Support Recovery
- Most Common Exercise Mistakes
- Red Flags: When to See a Podiatrist
- Frequently Asked Questions
- Sources
Your ankle is swollen and sore the morning after a sprain. Everything in your instincts says to rest it completely — no movement, ice, elevation, wait for it to get better. But in our clinic, we see a clear pattern: the patients who start gentle rehabilitation exercises within 48 hours recover faster, develop less chronic stiffness, and are far less likely to have a repeat sprain than those who rest and wait. This is not because movement overrides healing — it is because controlled, purposeful movement drives healing. This guide gives you the exact exercise progression we prescribe at Balance Foot & Ankle for ankle sprains from mild Grade I to severe Grade III.
Why Exercises Matter After an Ankle Sprain
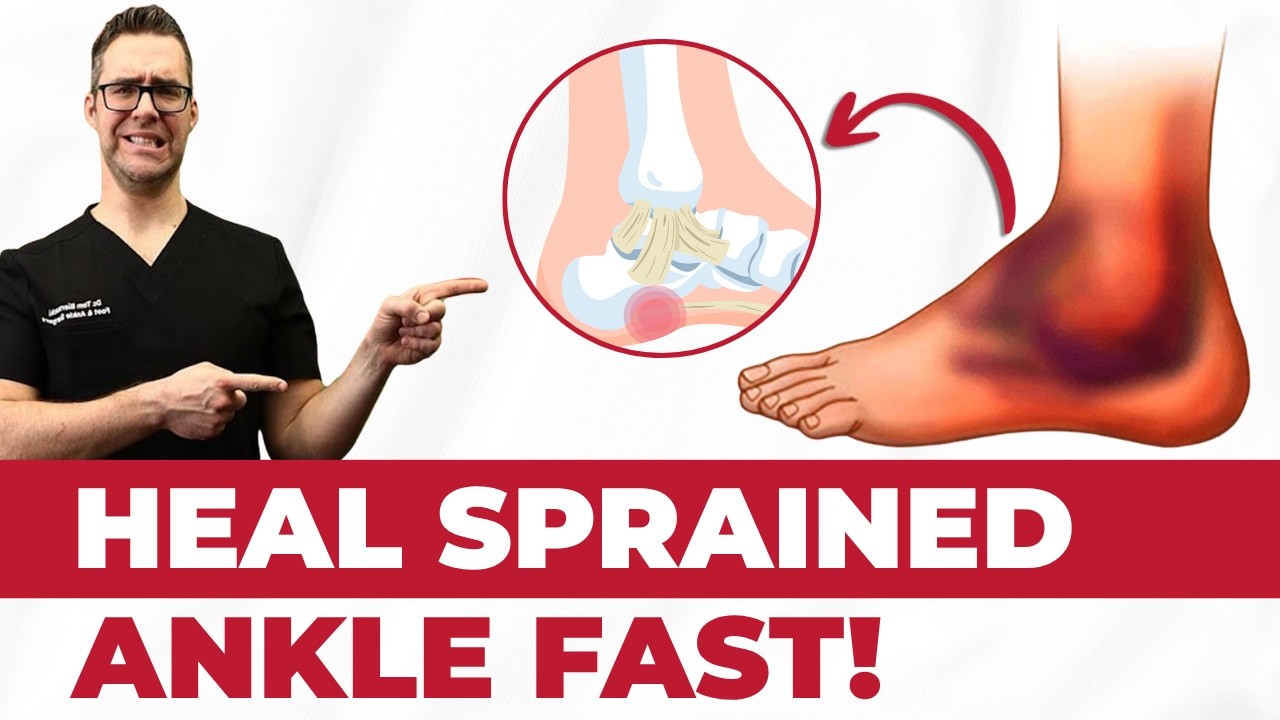
When an ankle ligament tears, two things are damaged: the mechanical structure of the ligament itself, and the proprioceptive nerve endings within the ligament that tell your brain where your ankle is in space. This second type of injury — sensory disruption — is what most people do not think about, and it is the primary driver of chronic ankle instability. The mechanoreceptors embedded in the ATFL and CFL report on ankle position milliseconds before a potentially injurious movement, triggering the peroneal muscles to fire reflexively and prevent a roll. After a sprain, this feedback system is disrupted. Without targeted rehabilitation, it does not fully restore, leaving the ankle neurologically vulnerable even after the structural ligament has healed.
Exercise rehabilitation addresses both dimensions simultaneously: peroneal strengthening provides active mechanical stability, and balance training restores the proprioceptive feedback loop. Studies in The American Journal of Sports Medicine document that structured ankle rehabilitation reduces re-sprain risk by approximately 70% compared to passive rest. The exercises below are sequenced precisely to match what the healing ankle tissue can tolerate at each phase — doing too much too soon increases swelling and delays healing, while doing too little leaves the ankle unprotected.
Phase 1 Exercises: Acute Phase (Days 1–7)
During the acute phase, the goal is to control swelling and prevent stiffness without stressing the healing ligament. Movement is gentle, pain-guided, and performed within a comfortable, non-painful range. Do not push through significant pain — some mild discomfort is acceptable, sharp pain or increased swelling after exercise means you need to reduce intensity. These exercises are safe to begin within 24–48 hours of a Grade I or II sprain; Grade III sprains may need 3–5 days before beginning Phase 1 movement.
Ankle Alphabet
How to perform: Sit in a chair with your injured foot elevated on your knee or a footstool. Using your big toe as a “pen,” trace all 26 capital letters of the alphabet in the air. Move only at the ankle — do not rotate at the knee or hip. Perform 1–2 sets of the full alphabet, 2–3 times daily.
Purpose: The alphabet exercise moves the ankle through its full multi-plane range of motion in a controlled, non-weight-bearing position, preventing stiffness and stimulating early proprioceptive input without loading the healing ligament.
Towel Ankle Circles
How to perform: Loop a towel around the ball of your foot. Hold both ends of the towel with your hands. Use the towel resistance to gently move the ankle through circles clockwise and counterclockwise — 10 circles each direction, 2 sets. The towel provides gentle proprioceptive feedback without requiring active stabilization.
Pumping (Ankle Dorsiflexion/Plantarflexion)
How to perform: Seated, flex your foot upward as far as comfortable (dorsiflexion), hold 2 seconds, then point downward (plantarflexion), hold 2 seconds. Perform 20 repetitions, 3 sets, 3 times daily. This activates calf muscles and the anterior tibialis, promoting lymphatic drainage and reducing swelling through muscle pump action.
Phase 2 Exercises: Mobility Restoration (Weeks 1–3)
As swelling stabilizes and weight-bearing becomes more comfortable (usually by days 5–10 for Grade I, weeks 1–2 for Grade II-III), Phase 2 begins. The emphasis shifts to restoring full ankle range of motion — particularly dorsiflexion, which is typically restricted after lateral ankle sprains and is critical for normal walking mechanics.
Gastrocnemius Stretch (Straight-Leg Calf Stretch)
How to perform: Stand facing a wall, hands on wall at shoulder height. Injured foot back, heel flat on the floor, knee straight. Bend the front knee gently, leaning hips toward the wall until you feel a stretch in the calf of the back leg. Hold 30 seconds, 3 repetitions, twice daily. This stretches the gastrocnemius muscle, which restricts dorsiflexion when tight and increases the mechanical load on the ankle ligaments during walking.
Soleus Stretch (Bent-Knee Calf Stretch)
How to perform: Same position as gastrocnemius stretch but with the back knee slightly bent. Leaning forward puts the stretch deeper into the soleus (the muscle underneath the gastrocnemius). Hold 30 seconds, 3 repetitions, twice daily. The soleus is the primary Achilles tendon contributor during activities like stair climbing, and restoring its flexibility is essential before returning to stairs or inclines.
Towel Inversion and Eversion Stretching
How to perform: Seated, loop a towel around the ball of your foot. For inversion mobility: hold the towel anchored to one side, use your foot to push gently outward against it (resisted eversion), then relax and allow the towel to guide the foot inward — 10 repetitions. For eversion mobility: reverse the resistance direction. Do NOT force the ankle into painful inversion — work only within comfortable range. This restores the lateral motion that was stressed during the injury without loading the ankle joint.
Phase 3 Exercises: Strength and Proprioception (Weeks 3–6)
Phase 3 is the most important phase for preventing re-injury. Once full range of motion is restored and weight-bearing is pain-free, the focus shifts to building active ankle stabilizers and retraining the proprioceptive system. This phase should not be rushed — beginning agility work before completing Phase 3 is the most common reason for recurrent ankle sprains in returning athletes.
Resistance Band Eversion (Peroneal Strengthening)
How to perform: Sit in a chair, ankle at 90 degrees. Anchor a resistance band to a fixed object at foot level on the inner side of your foot. Loop the band around the outer forefoot. Turn the foot outward against band resistance (eversion), hold 2 seconds, return slowly. 3 sets × 15 reps, twice daily. The peroneus longus and brevis are the primary dynamic stabilizers that prevent inversion injury — this exercise is the single most important rehabilitation exercise for ankle sprain prevention. Progress from light to medium to heavy resistance band over 3 weeks.
Single-Leg Balance (Proprioception Progression)
How to perform — 4-stage progression:
- Stage 1: Single-leg stance on flat floor, eyes open — hold 30 seconds × 3, progress to 60 seconds
- Stage 2: Single-leg stance on flat floor, eyes closed — hold 20 seconds × 3 (removes visual compensation, forces pure vestibular and ankle proprioception)
- Stage 3: Single-leg stance on a folded towel or foam pad, eyes open — adds unstable surface challenge
- Stage 4: Single-leg stance on foam pad, eyes closed — maximum proprioceptive challenge
Progress to the next stage when the current stage is comfortable and stable for the full hold time. Never advance to Stage 4 if you are still having any episodes of ankle giving way.
Single-Leg Calf Raises
How to perform: Stand on the edge of a step, holding a railing lightly for safety. Lower your heel below the step level (eccentric load), then rise onto your toes (concentric contraction). Begin bilateral (both feet), progress to single-leg as strength allows. 3 sets × 15 reps, daily. Calf strengthening is essential for dynamic ankle stability — weak plantar flexors place all stabilization demand on the passive ligamentous restraints.
Four-Way Hip Strengthening (Hip Abductors and External Rotators)
This is often omitted but critically important: hip abductor and external rotator weakness increases the risk of ankle inversion during running and jumping by allowing the knee to collapse medially, which shifts ground reaction force to the lateral ankle. Side-lying hip abduction (clamshells, lateral leg raises) and standing hip external rotation with resistance band are integrated in Phase 3 for all athletes. 3 sets × 15 reps each direction, daily.
Phase 4 Exercises: Return to Sport (Weeks 6–12)
Phase 4 begins when Phase 3 criteria are met: pain-free single-leg balance on foam for 30 seconds with eyes closed, single-leg calf raise × 20 without pain, and normal gait pattern without compensation. Sport return is progressive and graded, wearing a functional ankle brace for all sessions for at least the first 6 months.
Running Progression
Start: 10-minute flat surface jog at 60% effort, stop if pain or swelling. Increase duration by 10% per session if asymptomatic. Progress to direction changes at week 8: figure-of-8 running at reduced speed, then full speed. Progress to cutting drills (45-degree cuts, then 90-degree cuts) at weeks 9–10. Full unrestricted sport-specific training at weeks 10–12 if all movement is pain-free and ankle feels stable.
Hop Tests for Clearance
Before returning to competitive sport, the hop test battery confirms functional readiness: single-leg hop for distance, triple hop for distance, and 6-meter timed hop. The injured ankle must perform ≥90% of the uninjured ankle on all three tests. This ensures that strength and neuromuscular control have recovered to a level that provides adequate protection — not just that the ankle “feels okay.”
Products That Support Ankle Sprain Recovery
DASS Medical Compression Socks — Swelling Management
Swelling control is active, not passive. DASS 15–20 mmHg graduated compression socks accelerate venous and lymphatic return from the foot and ankle, reducing swelling faster than elevation alone. They’re particularly valuable during Phase 2 and early Phase 3, when increasing activity tends to re-aggravate swelling. Wear from morning until evening elevation. Unlike ACE bandages (which compress non-uniformly), graduated compression socks provide consistent circumferential pressure that is both more comfortable and more effective for post-sprain edema management.
Best for: Phase 1–3 ankle sprain swelling; patients who must remain on their feet during the day; return-to-sport phase where end-of-day swelling is a problem.
Not Ideal For: Peripheral arterial disease; inside a rigid walking boot (may impair circulation); compression alone does not replace ice and elevation in the first 48 hours.
PowerStep Pinnacle Insoles — Pronation Control During Rehab
After a lateral ankle sprain, many patients develop compensatory pronation — the foot rolls inward excessively as it unconsciously tries to offload the tender outer ankle. This compensation pattern, if uncorrected, creates secondary overuse injuries at the medial arch, posterior tibial tendon, and plantar fascia. PowerStep Pinnacle’s firm arch shell and deep heel cup prevent this compensatory pattern during Phase 3 and 4 rehabilitation, ensuring that strength training and return-to-sport occur with proper foot mechanics.
Best for: Phase 3–4 rehabilitation footwear; patients with flat feet or concurrent plantar fasciitis; daily use once back in regular shoes or athletic shoes.
Not Ideal For: Use inside rigid walking boot; high-arch supinators who may be prone to re-injury from lateral ankle rolls (neutral insole preferred); does not replace an ankle brace during sport.
Most Common Ankle Sprain Exercise Mistake
The most common mistake we see is skipping Phase 3 entirely. Patients complete Phase 1 (swelling resolves) and Phase 2 (they can walk without limping) and declare themselves “healed.” They return to sport without ever systematically strengthening the peroneal muscles or rebuilding proprioceptive awareness. When the ankle is next challenged — a cut, an unexpected step, a basketball landing — the neuromuscular protective response fires too slowly and too weakly, and the ankle rolls again. Frequently harder than the first time. The second most common mistake is performing Phase 4 return-to-sport drills without wearing an ankle brace. Even when the ligament has matured structurally, the first 6–12 months of return to sport carry elevated risk — external bracing provides the margin that allows the neuromuscular system to catch up.
⚠ Red Flags: See a Podiatrist Before Continuing Exercises
- Severe pain during any Phase 1 exercise — may indicate Grade III tear or associated fracture requiring imaging before rehab begins
- Swelling that increases with gentle Phase 1 exercises — too early to load; return to rest and ice, reassess in 48 hours
- Ankle giving way during Phase 3 balance work — instability not resolving with rehabilitation; may need MRI and surgical consultation
- Persistent lateral ankle pain beyond 8 weeks — peroneal tendon tear or osteochondral lesion of the talus must be ruled out
- Medial ankle pain developing during rehabilitation — spring ligament or deltoid ligament involvement requiring separate evaluation
- Pain in the midfoot or heel during Phase 4 running — secondary overuse injury from altered mechanics during rehabilitation
Ankle Sprain Rehabilitation at Balance Foot & Ankle
Dr. Tom Biernacki offers same-day ankle sprain evaluation and builds individualized rehabilitation programs at our Howell and Bloomfield Hills offices. We grade your sprain, rule out fracture, and give you a precise exercise protocol for your specific injury — not a generic handout.
Book Appointment (810) 206-1402Frequently Asked Questions
When can I start exercising after an ankle sprain?
For Grade I sprains, gentle Phase 1 exercises (ankle alphabet, pumping) can begin within 24–48 hours. For Grade II partial tears, Phase 1 exercises typically begin at 2–5 days once acute swelling stabilizes. For Grade III complete ruptures, begin Phase 1 at 5–7 days after ensuring no associated fracture. The guiding principle: if an exercise significantly increases pain or swelling, you are starting too early — reduce intensity and retry in 24–48 hours.
How long should I do ankle sprain exercises?
Phase 1 exercises: 1–7 days. Phase 2 mobility exercises: 1–3 weeks (continue Phase 1 exercises). Phase 3 strengthening: 3–6 weeks (continue earlier phases). Phase 4 return-to-sport: 6–12 weeks. After completing formal rehabilitation, the peroneal strengthening exercises (resistance band eversion, single-leg calf raises) should become a permanent warm-up component before any sporting activity. Many athletes incorporate these into their pre-activity routine indefinitely.
Should I use a brace while doing exercises?
For Phase 1–2 non-weight-bearing exercises, a brace is not needed. For Phase 3 weight-bearing balance and strengthening exercises, a semi-rigid or lace-up brace provides external stabilization while the peroneal system is being retrained — reducing injury risk during the vulnerable period. For Phase 4 return-to-sport, always wear a functional ankle brace. After full return to sport, brace use during the first 6–12 months of competition significantly reduces re-sprain risk.
What is the most important exercise for preventing ankle sprain recurrence?
Resistance band eversion (peroneal strengthening) is the single most important exercise for preventing ankle sprain recurrence. The peroneal muscles are the primary active defense against ankle inversion — the mechanism that causes 85% of ankle sprains. Strong, rapidly reactive peroneals fire within milliseconds of detecting an inversion stress, aborting the roll before the ligament is stretched. No other single intervention reduces re-sprain risk as reliably as consistent peroneal strengthening.
When should I see a podiatrist for ankle sprain exercises?
See a podiatrist for personalized exercise guidance if: your sprain is Grade II or III, you are an athlete who needs precise return-to-sport clearance, your ankle continues to give way during Phase 3 exercises, you have pain beyond 6–8 weeks, or you have had multiple ankle sprains (suggesting chronic instability requiring formal assessment). Our office can also assess for associated injuries (peroneal tendon tear, osteochondral lesion) that require modified rehabilitation protocols. Call (810) 206-1402 for a same-day appointment.
Sources
- Vuurberg G, Hoorntje A, Wink LM, et al. “Diagnosis, treatment and prevention of ankle sprains: update of an evidence-based clinical guideline.” British Journal of Sports Medicine. 2018;52(15):956.
- Doherty C, Bleakley C, Hertel J, Caulfield B, Ryan J, Delahunt E. “Recovery From a First-Time Lateral Ankle Sprain and the Predictors of Chronic Ankle Instability.” American Journal of Sports Medicine. 2016;44(4):995–1003.
- Maffulli N, Ferran NA. “Management of acute and chronic ankle instability.” Journal of the American Academy of Orthopaedic Surgeons. 2008;16(10):608–15.
- McKeon PO, Hertel J. “Systematic review of postural control and lateral ankle instability, part II: is balance training clinically effective?” Journal of Athletic Training. 2008;43(3):305–15.
- Petersen W, Rembitzki I, Koppenburg AG, et al. “Treatment of acute ankle ligament injuries: a systematic review.” Archives of Orthopaedic and Trauma Surgery. 2013;133(8):1129–41.

Frequently Asked Questions
When should I see a podiatrist?
See a podiatrist if: foot or ankle pain has lasted more than 2–4 weeks without improvement, you’re changing your gait to avoid pain, you have an open wound or sore that isn’t healing, you notice nail discoloration or thickening, you have diabetes and any foot concern, or pain is severe enough to wake you at night. Most foot conditions are easier and cheaper to treat early — what starts as a minor issue can become a surgical problem with months of delay.
What is the difference between a podiatrist and an orthopedic surgeon?
Podiatrists (DPM — Doctor of Podiatric Medicine) specialize exclusively in the foot, ankle, and lower leg. Orthopedic surgeons (MD/DO) have broader musculoskeletal training but variable foot/ankle subspecialization. For foot and ankle-specific problems, a podiatrist often has more focused training and experience. For injuries involving the leg above the ankle, complex pediatric cases, or multi-level reconstruction, orthopedic consultation may be appropriate. We frequently co-manage patients with orthopedic colleagues.
How do I know if my foot pain is serious?
Signs that warrant same-day or next-day evaluation: severe pain that appeared suddenly without clear cause, swelling, redness, and warmth that appeared suddenly (possible gout, infection, or Charcot fracture), an open wound that looks infected (redness spreading, pus, warmth), inability to bear weight, or any foot problem in a diabetic patient. Pain that’s been present for weeks and is stable is important but not an emergency — schedule within 1–2 weeks.
Can foot problems cause back and knee pain?
Yes — this is a kinetic chain effect. Abnormal foot mechanics (overpronation, supination, leg length discrepancy) cause compensatory changes in knee, hip, and lumbar alignment. Roughly 30% of patients presenting to our clinic with knee pain have a treatable foot-level biomechanical cause. Correcting foot mechanics with orthotics or appropriate footwear often provides significant knee and back relief. If you have chronic knee or back pain and haven’t had your foot mechanics evaluated, it’s worth a consult.
Are orthotics worth it?
For the right conditions, yes — custom orthotics are among the most cost-effective interventions in podiatry. They’re most effective for: plantar fasciitis, flat feet with secondary knee/back pain, leg length discrepancy, metatarsalgia, posterior tibial tendon dysfunction, and diabetic foot pressure management. Quality OTC orthotics ($35–60) resolve symptoms for 60% of patients with mild-to-moderate conditions. Custom orthotics are appropriate when OTC options have failed or when the biomechanical problem is complex. We cast custom orthotics in-office.
How do I choose the right running shoes?
Start with your foot type (flat, neutral, high arch) and running pattern (overpronator, neutral, supinator). Flat feet and overpronators do best in stability or motion-control shoes. Neutral feet do well in neutral-cushioned shoes. High arches need maximum cushioning with flexible soles. Always buy running shoes at the end of the day (foot swelling peaks then), get properly fitted by a specialist, and replace every 300–500 miles. If you’ve been injured repeatedly, a gait analysis can identify the mechanical flaw driving your injury pattern.
What is the difference between a sprain and a fracture?
A sprain is a ligament injury (the tissue connecting bones); a fracture is a break in the bone itself. Both can occur with the same trauma (ankle roll, fall). The old test — ‘if you can walk, it’s not broken’ — is wrong; many fractures are initially weight-bearable. Key differences: a fracture typically produces localized bone tenderness along the bone itself, while a sprain is tender over the ligament. X-ray is the standard to differentiate. High-grade sprains without proper treatment can be as disabling as fractures.
How do I prevent foot and ankle injuries?
The four most impactful prevention strategies: (1) Supportive, appropriately fitted footwear for your foot type and activity. (2) Gradual activity progression — the 10% rule (never increase weekly mileage or intensity by more than 10%). (3) Regular calf and ankle mobility work. (4) Strengthening the posterior tibial tendon, peroneals, and intrinsic foot muscles. Most overuse injuries are preventable; most acute injuries are not — but ankle sprain recurrence (60–70% without rehab) is prevented by balance and proprioception training.
Ready to get relief? Book an appointment at Balance Foot & Ankle or call (810) 206-1402. Same-day appointments available in Howell & Bloomfield Hills, MI.
Doctor Hoy’s Natural Pain Relief Gel
Natural topical pain relief I use in our clinic. Arnica + camphor formula — apply directly to the area 3–4x daily. ($20–25)
Shop Doctor Hoy’s →OrthoInfo – AAOS: Sprained Ankle
In-Office Treatment at Balance Foot & Ankle
If home treatment isn’t providing relief for your ankle sprain, our podiatry team at Balance Foot & Ankle can help with same-day evaluations and advanced in-office care.
Same-day appointments available. (810) 206-1402
Get Expert Care at Balance Foot & Ankle
Same-week appointments at our Howell and Bloomfield Hills offices. Board-certified podiatric surgeons. Most insurance accepted.
Same-Week Appointments in Howell & Bloomfield Hills
Three board-certified podiatric surgeons. 1,123+ five-star reviews. Most insurance accepted.
Dr. Tom Biernacki, DPM is a board-certified foot & ankle surgeon (ABFAS & ABPM) at Balance Foot & Ankle Specialists in Southeast Michigan. With over a decade of clinical experience, he specializes in heel pain, bunions, diabetic foot care, sports injuries, and minimally invasive surgery. Dr. Biernacki is a member of the APMA and ACFAS, and his patient education content on MichiganFootDoctors.com and YouTube has made him one of the most-followed foot & ankle educators on YouTube.